Uncategorized

Can You Put Smelly Shoes in the Washing Machine? Explained

Wearing footwear made from synthetic materials or leather treated with chemical products, which retain sweat and are causing foot odor.  

This can be a big problem in our daily lives, especially when it comes to taking off our shoes. 

It is clear that the bad smell in the shoes is due to the sweat on our feet. However, on many occasions, you will have noticed that there are shoes that smell worse than others.  

Perhaps it is due to the material with which they are made or to the insoles that absorb more sweat and retain it, which favors the appearance of bacteria. 

What causes shoes to smell bad? 

Why do your feet have such a strong particular odor? 

As a pair, your feet have 250,000 sweat glands that make about one cup of sweat every day. That means your feet can produce more sweat per square inch of skin than any other part of your body. 

Actually, the sweat itself isn’t the problem, the type produced by your foot glands is typically odorless, its bacteria that’s the main culprit. 

The bacteria that live on the skin of your feet like living and the moist warm environment your sock provides and they like hanging out on sweaty bare feet.  

When these bacteria digest the amino acids in your foot sweat, they produce a by-product that smells well. If you happen to have a lot of bacteria living on your feet you might have more issues with foot odor than others. 

Does washing shoes remove the smell? 

Yes, regularly washing your smelly shoes can help to reduce the bad odor. However, washing your shoes is not the only thing to do for reducing bad odor, you need to properly dry your shoes and also keep your feet hygienic all the time.   

It doesn’t matter if the shoe is of good quality, they all end up smelling bad. That is why we must maintain good cleanliness of them by washing them often. 

How to wash stinky shoes in the washing machine (6 Expert Tips) 

Cleaning your shoes or sneakers not only prolongs the lifespan of your sneakers but also keeps the sneakers away from bad odor. 

But how do you keep yours clean?  

Putting dirty shoes in the washer could ruin them and potentially permanently damage your washing machine. To avoid expensive mistakes, follow these 6 clever expert hacks. 

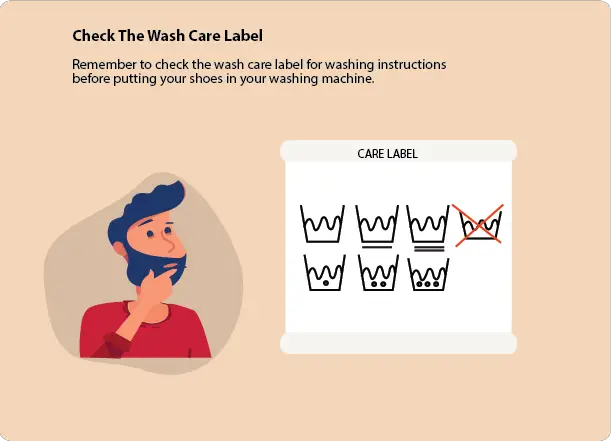
1. Check the care label 

First up check the washing care label on your shoes there’s always a care instruction tab in it. It’ll tell you what the material is and then it’s worth just checking on google if you’re not too sure. 

If in doubt always stick to hand washing 

check care label before putting shoes into the washing machine

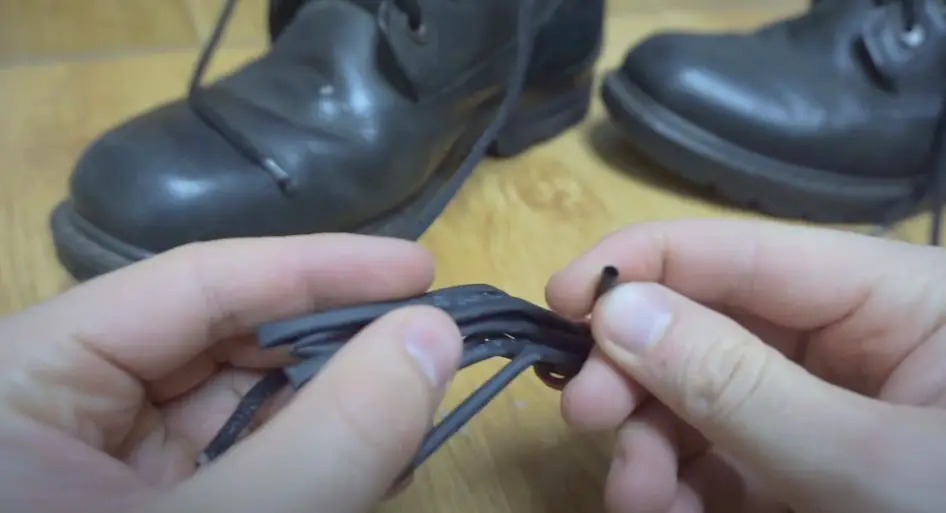
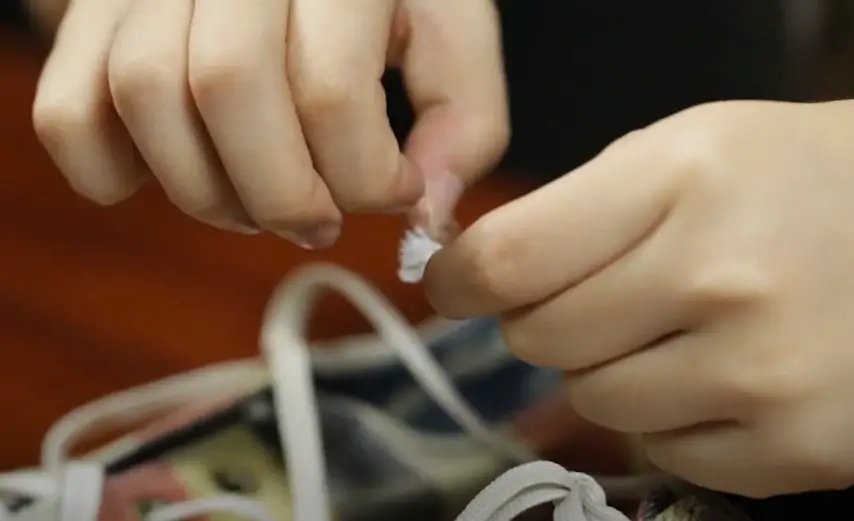
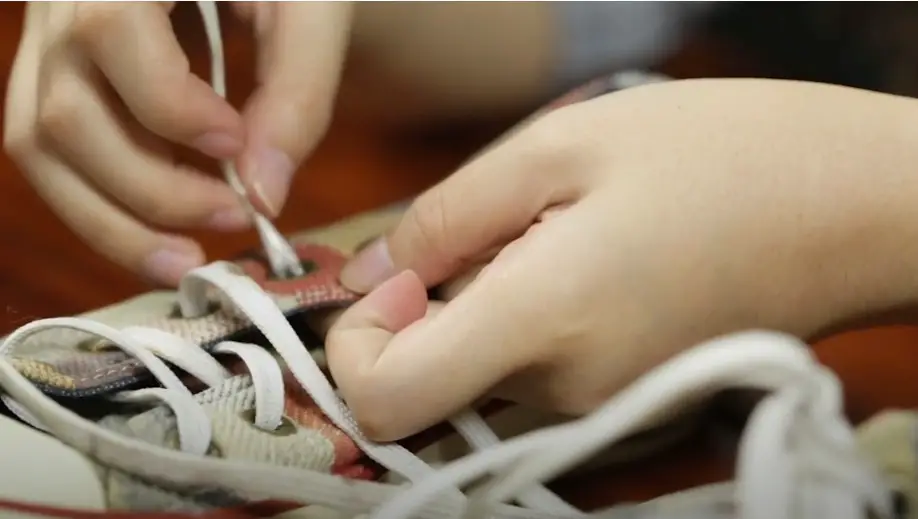
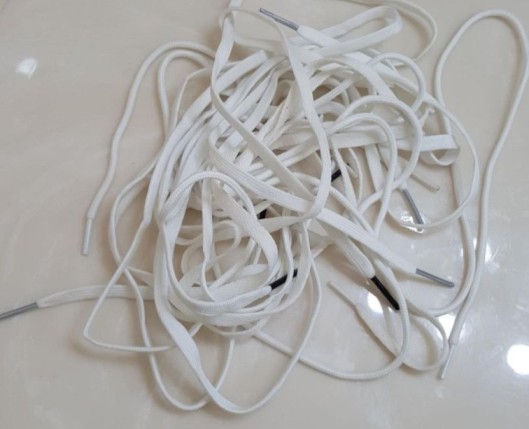
2. Remove Insoles and laces 

Before putting the shoe into the washing machine, thoroughly clean the outside of the shoe. You can use a special, dry cloth or a soft brush. 

To properly clean your shoes, remove any caked-on dirt before washing them.  

If you have any heavy soiling on the shoe or pre-treated by giving a light brush over it, makes it easy for the machine to kind of finish off what you can finish off.  

Always remove the insoles and laces pre-washed too. Insoles are usually made of a synthetic foam material that takes a really long time to dry. So, it’s best just to wipe them clean

remove insole and laces and prewashed too

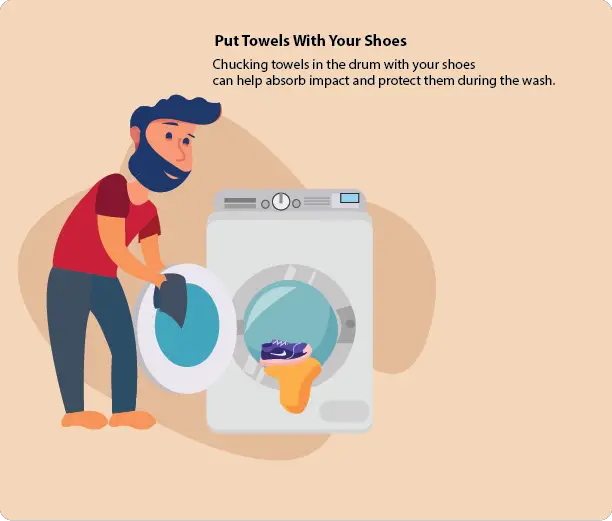
3. Put Towels with your shoes 

Chucking towels in the drum with your shoes can help absorb impact and protect them during the wash.  

Put it in a wash bag that again adds another layer of protection — laces are fine within the bag. 

The household item would be like a pillowcase that you don’t use again it’s just to provide shielding because the washing machine has little holes that the water drains up.  

If you do not want the fabric to snag on that cause damage to your shoe and also potentially a washing machine. 

putting towels with shoes for protection

4. Use Cold Wash 

To stop colors fading use a low temperature or cold wash. Never have any heat whatsoever in the washing machine leave it on slow cycle as well.  

Don’t have fast spin you want a slow gradual movement as long as possible under cold wash. 

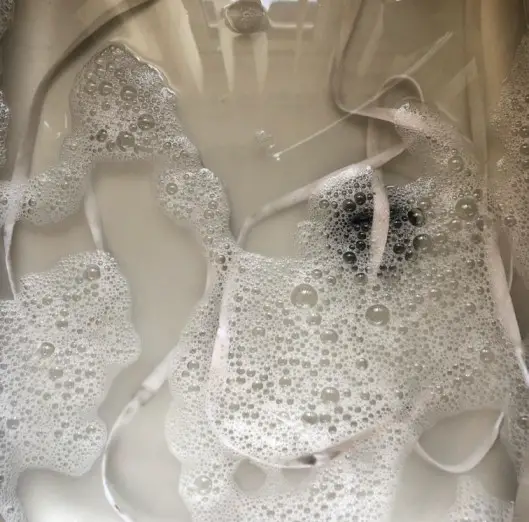
5. Use Liquid detergent & White Vinegar 

During the wash, the inside of your trainers doesn’t get as much water circulating in them. 

Meaning powder detergents might get stuck inside and along the seams especially in a cold setting instead use a liquid detergent that works better at lower temperatures. 

Also adding a half cup of white vinegar with liquid detergent will reduce the bad smell of your shoes. 
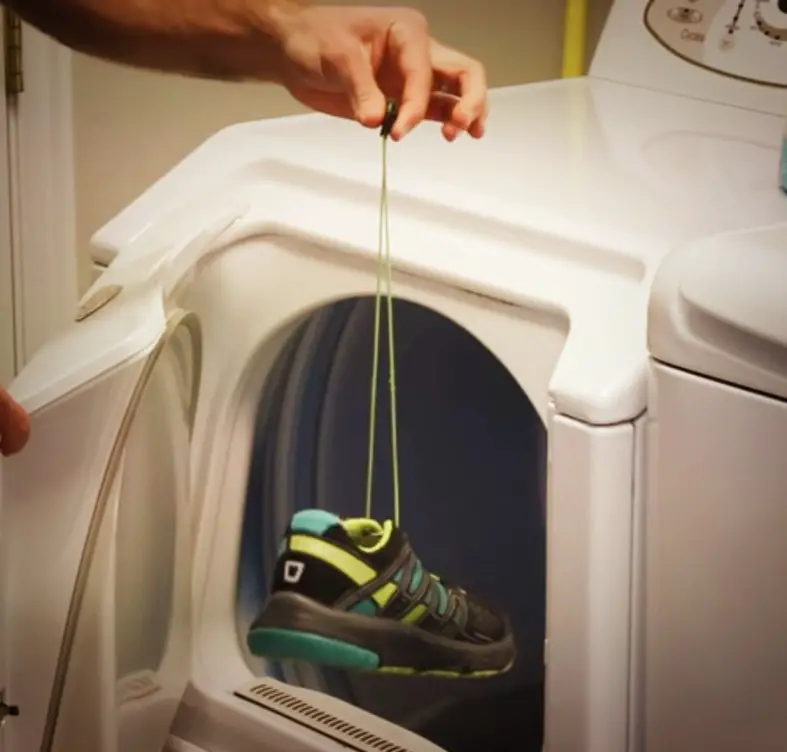
white vinegar for cleaning shoes

6. Drying 

Proper drying for your shoes is a crucial thing for killing the bacteria and reducing bad smells.  

When it comes to drying a golden rule is to avoid heat. 

However, if you are in hurry, you can put them in a dryer machine with proper methods. Don’t dry leather or suede-like shoes using the dryer.  

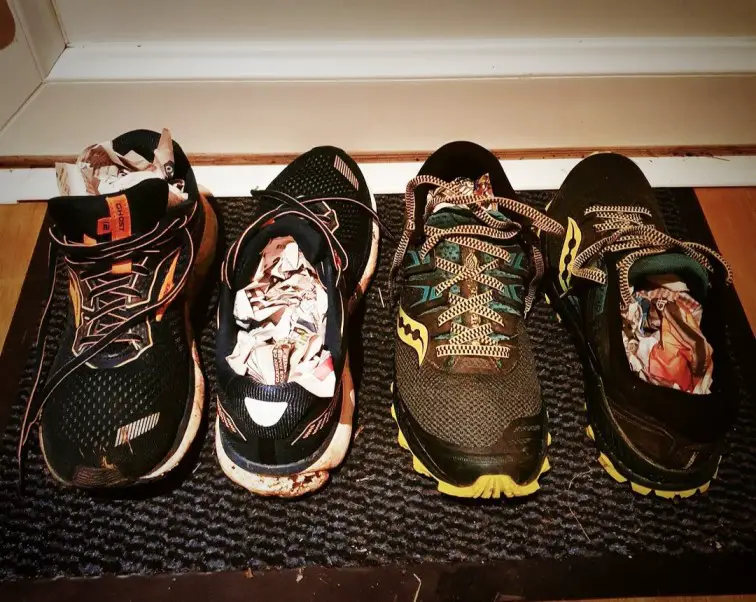
You can use the newspaper method to dry them. Stuff them with paper towels or silica gel bags to absorb as much moisture as possible. 

Hanging them ideally outdoors first from the heel then, if possible, turning the other way is best. You want to avoid leaving it in direct sunlight because it affects the color and potentially affects the feel of the material as well. 

How can you clean your stinky shoes naturally? 8 Clever Hacks 

With these tricks, you will disappear the odors caused by regular use and perspiration. All this with natural ingredients and in a very simple way. 

Let’s start! 

1. Baking Soda 

Baking soda is great for eliminating the bad smell of shoes. The reason is that this natural chemical element has antibacterial and disinfectant properties. That is why it is the most popular trick to eliminate foot odor. 

The method to do it is very simple: 

  • Put a tablespoon of baking soda (15 g) in each shoe, on top of the insoles. 
  • Distribute well and let it act overnight. 
  • The next morning, we will be able to verify that the bad smell of the shoes has disappeared. 

2. Sanitize method using Hydrogen peroxide 

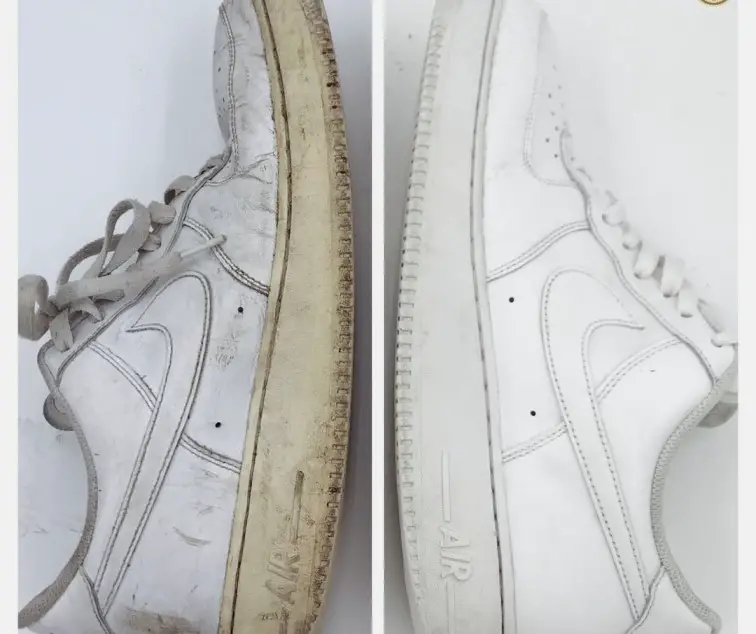
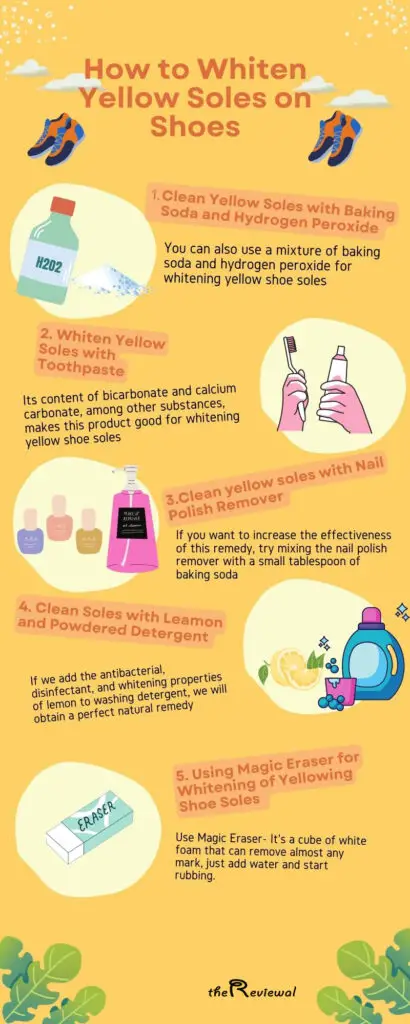
Hydrogen peroxide is one of the quintessential sanitizers for killing bacteria and fungus. So, it is best for preventing bad smells and cleaning yellow stains. Using hydrogen peroxide mixed with sodium bicarbonate will give you better results. 

  • Take two tablespoons of hydrogen peroxide (3%) mixed with 1 liter of water. 
  • Add 1 tablespoon of sodium bicarbonate into the solution  
  • Take a sprayer and spray the solution well. After two to three hours wash the shoe with clean water. 

This method is not suitable for Leather and Sude-like shoes. 

3. Killing the bacteria using the freezing technique 

Have you ever frozen your shoes? It sounds crazy but the truth is that it can be quite useful. 

Well, this trick is also applicable to get rid of the bad smell. You just have to leave them overnight.  The next morning dries them in the sun. 

4. Trick to eliminate bacteria using Lavender 

This trick that we show you below is as curious as it is effective. To carry it out, we only need a little sage and lavender.   

These two aromatic medicinal plants are very beneficial for combating bad odors, including foot odor, as they perfume in a delicate and relaxing way.  

To do this, place a few sage leaves along with a few lavender branches in each shoe. Then, take the shoes outside so that the fresh air can also help kill bacteria. 

The next morning, the bad smell in the shoes will be gone. 

5. The talcum powder trick 

Talcum powder has a similar effect to baking soda. They have the virtue of absorbing moisture and ending foot odor, and in this case, you can do it in two different ways: 

  • Sprinkle talcum powder inside each shoe and leave it on overnight. In the morning, you can get rid of the rest of the leftover powder and enjoy your shoes without a bad smell. 
  • Apply the talcum powder directly on the sole of the foot. In this way, you will reduce the sweating that causes the bad smell in the shoes. 

6. Tea tree essential oil method 

Another one of the essential oils that you can use for odor in shoes is tea tree oil, as it has disinfectant properties and is, without a doubt, the most effective.  

You can make a shoe sanitizer spray out of it to get rid of foot odor, as well as use it to make hand sanitizer gel. 

7. Citrus peeling 

This simple remedy consists of using the peel of lemons, oranges, or tangerines to give our shoes a good smell. Although you can also use their essential oils and make a shoe disinfectant spray with them. 

In any case, citrus fruits will help us eliminate the bad smell in the shoes.  

Take a lemon, orange, or grapefruit peels and put them inside the smelly shoes. You must let them act all night so that they have enough time to neutralize it.  

If you use essential oils, you can use them directly on the skin to eliminate foot odor or make a shoe sanitizer spray with them. 

8. Using Alcohol 

You can also spray the inside of the shoe with rubbing alcohol. When it has dried, repeat it a couple of times and then leave the shoe to dry definitively in a warm place. It is recommended to carry out this trick at least once a week. 

Final Thoughts 

Try not to wear closed shoes every day or throughout the day. It is not only bad for promoting foot odor, but for the health of this area in general. 

When you get home, change your shoes and let your feet and shoes air out. 

I hope you found this article interesting and useful.    

With that, it’s time to hear what you have to say.    

Now you may have a clear idea of how can you put smelly shoes in the washing machine, and also alternative methods for cleaning smelly shoes. 

Or maybe you have a question.     

Either way, let me know your thoughts in the comments section below. 

Can You Put Smelly Shoes in the Washing Machine? Explained Read More »

asics nimbus 25 vs cumulus 25

Asics Nimbus 25 vs Asics Cumulus 25: An In-Depth Comparison 

If you’re looking for a DEEP comparison of Asics Nimbus 25 VS Cumulus 25, you’ve come to the right place. 

In this comprehensive article, we delve into the details of two of Asics’ most popular neutral running shoes: the Asics Nimbus 25 and the Asics Cumulus 25.  

By exploring the similarities and differences between these models, we aim to provide you with the insights necessary to make an informed decision when choosing your next pair of running shoes. 

Features Asics Nimbus 25 Asics Cumulus 25 
Cushioning Gel cushioning system Gel cushioning system 
Upper Material Engineered mesh with supportive overlays Engineered mesh with supportive overlays 
Weight Approximately 10.9 ounces (men’s) / 8.6 ounces (women’s) Approximately 9.5 ounces (men’s) / 8.2 ounces (women’s) 
Stack Height 25mm (Heel), 12mm (Forefoot) 23mm (Heel), 13mm (Forefoot) 
Drop 13mm 10mm 
Fit Medium to high volume Medium to high volume 
Stability Neutral Neutral 
Outsole Durable and flexible rubber Durable and flexible rubber 
Traction Reliable on various surfaces Reliable on various surfaces 
Toe Box Roomy toe box Roomy toe box 
Arch Support Neutral Neutral 
Breathability Moderate Moderate 
Durability Durable construction for long-lasting performance Durable construction for long-lasting performance 
Versatility Suitable for daily training and long-distance running Suitable for daily training and long-distance running 
Recommended Use Road running, daily training, and fitness activities Road running, daily training, and fitness activities 
Check the latest price on Amazon
For Men
For Women
Check the latest price on Amazon
For Men
For Women

You May Also Like – Asics Kayano 30 vs Asics GT 2000 11: A Detailed Comparison

Similarity and Differences: Gel-Nimbus 25 vs Gel Cumulus 25 

The Asics Gel Nimbus and Gel Cumulus have both gained a substantial following in the running community.  

Asics, a renowned athletic footwear brand, has designed these shoes to cater to neutral runners seeking optimal cushioning and comfort.  

While the Nimbus has enjoyed a loyal fan base for 25 years, the Cumulus stands out as a more affordable alternative, incorporating design elements inspired by the Nimbus.  

Let’s dive into the details and uncover the disparities between these two popular models. 

You May Also Like – ASICS Kayano 30 vs Nimbus 25: Choosing the Perfect Running Shoes for Your Needs 

Overview of Gel-Nimbus 25 

The Gel-Nimbus 25, available at $120.00 (previously $160), is Asics’ flagship neutral trainer.  

Known for its plush cushioning and gentle rocker, this maximalist shoe provides a comfortable and stable experience.  

Featuring the brand-new FF Blast+ Eco midsole foam, the Gel-Nimbus 25 strikes a balance between cushioning and stability.  

The increased midsole stack height and width, combined with the redesigned outsole, result in smoother transitions and enhanced durability.  

It’s important to note that the Gel-Nimbus 25 has a narrow toe box, so we recommend sizing up or opting for the wide version for a more accommodating fit. 

Reasons to choose asics Nimbus 25

Related Comparison – ASICS Novablast 3 vs ASICS Dynablast 3: A Comprehensive Comparison  

Overview of Gel Cumulus 25 

Priced at $139.00 (previously $140), the Gel Cumulus 25 is a plush riding, maximalist daily trainer.  

It excels in providing ample comfort for long-distance runs and recovery sessions.  

The Cumulus incorporates a softer and smoother ride compared to its predecessors, thanks to its revamped design.  

It features an engineered mesh upper and the responsive FF Blast+ midsole material, offering a balance between support and responsiveness.  

With a Gel unit in the heel, the Cumulus provides additional cushioning and support during your runs. 

Related Post – Asics GT 2000 11 vs Asics Gel Cumulus 25: Unveiling the Perfect Running Companion 

Reasons to choose asics cumulus 25

You May Also Like – Asics GT 2000 11 vs Asics Gel Nimbus 25: Which is Best for You?

Sole Unit: Gel-Nimbus 25 vs Gel Cumulus 25 

The sole unit plays a crucial role in determining the overall running experience and comfort provided by a shoe.  

Let’s explore the sole units of both the Gel-Nimbus 25 and Gel Cumulus 25. 

Gel-Nimbus 25 Sole Unit 

The Gel-Nimbus 25 boasts a super soft FF Blast+ Eco midsole, delivering a plush and cushioned feel underfoot.  

This shoe features a single GEL unit in the heel, absorbing the impact of foot strikes and providing enhanced comfort.  

The combination of the soft midsole and the GEL unit makes the Gel-Nimbus 25 an excellent choice for runners seeking a comfortable and well-cushioned ride.  

Additionally, the Nimbus is particularly suitable for long-distance runs and heavier-set runners due to its ability to maintain its softness over extended periods. 

Also Read – Do Asics Run Small, Big, or True to Size? Unveiling the Perfect Fit 

Gel Cumulus 25 Sole Unit 

In contrast, the Gel Cumulus 25 incorporates the responsive FF Blast+ midsole material, offering a slightly bouncier feel during runs.  

While it may not provide the same level of softness as the Nimbus, the Cumulus compensates with its responsiveness, making it ideal for runners who prioritize a shoe that aids in pace improvement.  

Similar to the Gel-Nimbus 25, the Gel Cumulus 25 also features a Gel unit in the heel, contributing to the overall cushioning and support. 

When comparing real-world running experiences, it becomes evident that the Gel-Nimbus 25 maintains its softness for longer durations, making it an excellent choice for extended running sessions and heavier runners.  

On the other hand, the Gel Cumulus 25 may experience a slight reduction in softness over longer distances.  

However, it compensates for this by providing increased responsiveness, making it a suitable option for runners looking to pick up the pace. 

Read Also – Asics Kayano 30 vs Asics Venture 9: A Detailed Comparison

Upper Unit: Gel-Nimbus 25 vs Gel Cumulus 25 

The upper unit of a running shoe plays a vital role in providing a comfortable and supportive fit.  

Let’s explore the differences between the upper units of the Gel-Nimbus 25 and Gel Cumulus 25. 

The Gel Cumulus 25 features an engineered mesh upper, providing breathability and flexibility during runs.  

On the other hand, the Gel-Nimbus 25 utilizes a knitted material for its upper.  

This material offers a stretchier and softer feel compared to the Cumulus.  

It’s important to note that the Nimbus has transitioned to a flat, knitted tongue, giving it a more streamlined appearance. 

In terms of premium features, the Nimbus used to boast a softer heel collar and tongue. 

However, the recent design changes have resulted in a more uniform upper construction across both models.  

Nonetheless, both shoes provide excellent upper comfort, and the choice between the two should not be solely based on the upper characteristics. 

comparison of asics nimbus 25 and cumulus 25

Related Post – Asics GT 2000 11 vs Asics Gel Venture 9: Which is Best for You?

Which One to Buy: Gel-Nimbus 25 vs Gel Cumulus 25 

Ultimately, the decision of which shoe to purchase depends on your specific preferences and requirements.  

Let’s summarize the key considerations for each shoe: 

Gel-Nimbus 25 

The Gel-Nimbus 25 is an excellent choice for: 

  • Heavier runners seeking optimal comfort and cushioning 
  • Runners prioritizing a softer shoe for extended running sessions 
  • Individuals who appreciate a gentle rocker and stability 
  • Those looking for a maximalist shoe with a narrow-toe box 

Related post – Brooks Ghost 15 vs Brooks Adrenaline GTS 22: A Comprehensive Comparison 

Gel Cumulus 25 

The Gel Cumulus 25 is recommended for: 

  • Runners desiring a softer shoe with increased responsiveness 
  • Individuals who value a plush and comfortable ride for daily training 
  • Those seeking a bouncier feel to aid in pace improvement 
  • Runners with a preference for a wider toe box 

Considering the price, the Gel-Nimbus 25 carries a $20 premium compared to the Gel Cumulus 25.  

While the Nimbus offers a high level of value for its specifications, the Cumulus may present a compelling alternative for budget-conscious runners. 

In conclusion, both the Asics Gel-Nimbus 25 and Gel Cumulus 25 are exceptional neutral running shoes with distinct characteristics.  

We recommend trying them on and considering your personal preferences to determine the ideal choice for your running needs. 

Pros and Cons of asics nimbus 25 vs cumulus 25

My Personal Experience with Asics Nimbus 25 and Asics Cumulus 25  

I’ve had the opportunity to run with both the Asics Nimbus 25 and the Asics Cumulus 25, and they have both left a significant impact.  

However, if I were to choose a favorite, it would undoubtedly be the Asics Nimbus 25. 

Let me start by sharing my experiences with the Asics Nimbus 25.  

From the moment I slipped them on, I could feel the luxurious cushioning and exceptional comfort they provided.  

The Nimbus 25’s cushioning system was outstanding, delivering a plush and responsive feel with every stride.  

It offered excellent shock absorption, minimizing the impact on my joints during longer runs.  

The shoe’s lightweight design and breathability were also impressive, keeping my feet cool and comfortable, even during intense training sessions.  

The Nimbus 25 performed exceptionally well on various terrains, from road runs to light trails.  

I remember wearing the Nimbus 25 during a half marathon and experiencing unparalleled comfort and support, which helped me achieve a personal best time.  

It truly propelled me forward and made every step enjoyable. 

Turning to the Asics Cumulus 25, this shoe also impressed me with its cushioning and overall performance.  

The Cumulus 25 delivered a comfortable and responsive ride, providing a good balance of cushioning and support.  

The cushioning system offered adequate shock absorption, allowing for a smooth and enjoyable running experience.  

The shoe’s lightweight construction and breathability were notable, ensuring my feet remained cool and dry throughout my runs.  

While the Cumulus 25 performed well on various surfaces, I found it particularly enjoyable for road runs.  

I recall wearing the Cumulus 25 during a 10K race and appreciating the comfortable and supportive feel it provided throughout the race. 

While both the Asics Nimbus 25 and the Asics Cumulus 25 have their strengths, the Asics Nimbus 25 stands out as my favorite running shoe.  

Its exceptional cushioning, comfort, and overall performance have made it my go-to choice.  

Whether it’s conquering long-distance races or tackling challenging terrains, the Nimbus 25 has consistently provided the reliability and support I need to perform at my best. 

Ultimately, the choice between the Asics Nimbus 25 and the Asics Cumulus 25 will depend on individual preferences, running style, and specific requirements.  

Both shoes offer remarkable qualities, but the Nimbus 25’s superior cushioning and overall comfort make it my personal favorite.  

I encourage you to try them on and test them out on different distances and terrains to determine which shoe best suits your needs. 

Also Read – 8 Ways to Spotting Fake ASICS Shoes: A Guide to Ensuring Authenticity

Average milage of asics nimbus 25 vs cumulus 25

Final Verdict 

In this comprehensive comparison of the Asics Nimbus 25 and Asics Cumulus 25, we have examined the similarities and differences between these two popular running shoes.  

From the sole unit to the upper construction, we have analyzed the key aspects that set these models apart.  

Remember, the perfect running shoe is subjective and varies from individual to individual.  

Consider factors such as cushioning, responsiveness, and fit to ensure a comfortable and enjoyable running experience.  

Whether you opt for the Gel-Nimbus 25 or Gel Cumulus 25, you can rest assured that you are choosing a quality shoe from a reputable brand like Asics. 

Related Comparison Article – Asics Gel Contend 8 vs Gel Nimbus 25:Which is Best for You?

Related Comparison Article – Asics Novablast 3 vs Nimbus 25: A Comprehensive Comparison 

Related Comparison Article – Asics Novablast 3 vs Cumulus 25 Running Shoes: Which is Best for You?

FAQs

What are the key differences between the Asics Nimbus 25 and Asics Cumulus 25 running shoes? 

  • The Asics Nimbus 25 and Asics Cumulus 25 are two popular models from Asics, designed for neutral runners seeking comfort and cushioning. 
  • The Nimbus 25 offers a maximalist, highly cushioned design with a gentle rocker, while the Cumulus 25 provides a plush and comfortable ride for daily training. 

Which shoe is more suitable for long-distance running? 

Both the Asics Nimbus 25 and Asics Cumulus 25 are suitable for long-distance running, but the Nimbus 25, with its maximal cushioning and stability, is often preferred by runners seeking enhanced comfort and support during extended runs. 

What is the pricing difference between the Asics Nimbus 25 and Asics Cumulus 25? 

The Asics Nimbus 25 is priced at $120.00 (previously $160), while the Asics Cumulus 25 is priced at $139.00 (previously $140). This means that the Nimbus 25 carries a $20 premium compared to the Cumulus 25. 

Which shoe is recommended for heavier runners? 

The Asics Nimbus 25 is a suitable choice for heavier runners due to its enhanced cushioning and stability.  

It provides the necessary support and comfort for a more enjoyable running experience. 

Are there any differences in the upper construction of these shoes? 

Yes, there are differences in the upper construction. 

The Asics Nimbus 25 features a knitted material upper, which offers a stretchy and soft feel.  

On the other hand, the Asics Cumulus 25 has an engineered mesh upper, providing breathability and flexibility. 

Does the Asics Gel-Nimbus 25 have a narrow toe box? 

Yes, the Gel-Nimbus 25 has a narrow toe box. 

To ensure a more accommodating fit, it is recommended to size up or consider the wide version of the shoe. 

Which shoe offers a more responsive ride? 

The Asics Cumulus 25 offers a slightly more responsive ride compared to the Gel-Nimbus 25.  

It provides a good balance of cushioning and responsiveness, making it suitable for runners who prefer a more dynamic running experience. 

What type of cushioning do these shoes provide? 

Both the Asics Nimbus 25 and Asics Cumulus 25 offer highly cushioned rides.  

The Nimbus 25 provides a plush cushioning experience, while the Cumulus 25 strikes a balance between plushness and responsiveness. 

Are these shoes suitable for runners with stability needs? 

Yes, both the Asics Nimbus 25 and Asics Cumulus 25 are designed to cater to neutral runners with stability needs.  

They provide the necessary support and stability for a smooth and comfortable run. 

Can I use these shoes for recovery runs? 

Yes, both the Asics Nimbus 25 and Asics Cumulus 25 are suitable for recovery runs.  

Their cushioned designs help absorb impact and provide the necessary comfort for post-run recovery. 

Which shoe is recommended for runners seeking a soft and cushioned experience? 

The Asics Nimbus 25 is recommended for runners who prioritize a soft and cushioned experience.  

Its maximalist design and gentle rocker provide excellent comfort during runs. 

Do these shoes have good durability? 

Yes, both the Asics Nimbus 25 and Asics Cumulus 25 are designed with durability in mind.  

They feature quality materials and construction to ensure long-lasting performance. 

How do the soles of these shoes differ? 

The Asics Nimbus 25 features a super soft FF Blast+ Eco midsole, providing a plush and cushioned feel.  

The Asics Cumulus 25 utilizes the responsive FF Blast+ midsole material, offering a slightly firmer ride with added responsiveness. 

Which shoe is more suitable for runners looking for a wider toe box? 

The Asics Cumulus 25 is more suitable for runners who prefer a wider toe box, as it provides a more accommodating fit compared to the Gel-Nimbus 25. 

What are the expert scores for these shoes? 

Both the Asics Nimbus 25 and Asics Cumulus 25 receive positive expert scores, typically around 8 out of 10, indicating their high quality and performance. 

How do I choose between the Asics Nimbus 25 and Asics Cumulus 25? 

Consider factors such as your running style, preferences for cushioning and responsiveness, as well as your budget.  

Heavier runners and those seeking maximum cushioning may lean towards the Asics Nimbus 25, while those looking for a softer yet responsive ride may prefer the Asics Cumulus 25.

Asics Nimbus 25 vs Asics Cumulus 25: An In-Depth Comparison  Read More »

Brooks Ghost 14 vs Brooks Levitate 5: Which is good for you? 

In this post, I’m going to put Brooks Ghost 14 and Levitate 5 to the test. 

So, if you’re looking for a DEEP comparison of these two popular shoes, you’ve come to the right place. 

Because in today’s post I’m going to compare Brooks Ghost 14 vs Brooks Levitate 5 in terms of: 

  • Materials & Aesthetic 
  • Technology 
  • Support 
  • Comfort 
  • Durability 
  • Unique features 
  • And lots more 

Check out our detailed Article… 

Technical Details

Brooks Ghost 14Brooks Levitate 5
TerrainRoadRoad
Arch SupportNeutralNeutral
Weight280g311g
PronationUnderpronation
Supination
Neutral Pronation
Underpronation
Supination
Neutral Pronation
Arch TypeHigh ArchHigh Arch
Forefoot Height24mm21mm
Heel to Toe Drop12mm8mm
Uses Daily Run
Long Distance
Workout
Workout
Speed Run
Treadmill
MaterialMesh UpperKnit Upper
Strike PatternHeel StrikeForefoot/Midfoot strike
Toe BoxWideWide
Check the price for men

Check the price for women
Check the Price for men

Check the price for women

You May Also like – Brooks Revel 6 vs Levitate 6: Choosing the Perfect Running Shoe 

Key Differences between Brooks Ghost and Levitate 

Design-wise both of them are pretty similar, but they are still miles apart. 

The major difference is the Ghost 14 has a mesh upper while the Levitate 5 has a knit upper  

Other key differences are, 

  • Heel to Toe Drop of the ghost 14 is 12mm and the Levitate 5 has an 8mm drop.  
  • Both of them have a wider toe box. 
  • The brooks ghost 14 is slightly more lightweight than Levitate 5 

You May Also Like – Brooks Revel 6 vs Ghost 15:Which Is Best for You? A Comprehensive Comparison 

Brooks Ghost 14 VS brooks Levitate 5 Comparison

First talk about Levitate 5 

Design 

The levitate 5 is a shoe that’s built for faster training sessions there may be a moderately thick wedge of DNA and midsole foam.  

But the shoe is a long way from a soft cushioned option, instead offering a firm responsive feel when picking up the pace. 

Design-wise towards more traditional with a well-padded upper and a generous shape.  

Although you can also pick up the levitate 5 stealth which has a leaner snugger fit.  

The levitate 5 also comes in a GTS edition which is the same design but with additional support 

You May Also Like – Brooks Cascadia 16 Vs Ghost 15: Which Running Shoe is Right for You?

Fit

So, in terms of fit, this is actually the first, levitate shoe that I run in the series.  

I have spent a lot of running time with the brooks ghost 14 and I think there are similarities in terms of the fit with this shoe and also those kinds of space-age brooks aurora shoes.  

I would say generally it’s been a really comfortable kind of snug-fitting upper I’ve no real complaints actually. 

You’re not getting as much kind of padding as you do in ghost 14.  

The tongue panning is very similar in terms of that, the lace is a pretty kind of standard fare for me.  

It’s quite a nice generous shoe without being too loose it definitely fits true to size for me, and I found it to be very comfortable.  

It’s got nice stepping comfort it’s quite plush at the top and I have no issues with it at all. 


Midsole

It’s a very firm midsole there’s not a lot of energy returns or bounce even though brooks do say that quite a lot on the website that said shoe design for energy return.  

I think it is responsive because of that hard midsole. But I didn’t really feel anything when I was wearing it. 

Definitely didn’t feel like I was getting a lot of help in running faster, so I think if you like a shoe that’s hard and you don’t want any bounce or you don’t want any modern technology that adds any sort of energy return or any sort of feeling that gives you that proportion, I think it’s fine.  

It feels like a very traditional hard-training shoe. 

Also Read – Brooks Launch 10 vs Levitate 6: Unveiling the Ultimate Running Shoe Showdown 

Pros And Cons

brooks ghost14  vs levitate 5 pros and cons

Let’s talk about the ghost 14 

Design

The gross 14 is the latest version of brooks’ popular daily shoe lineup, designed to offer comfort and cushioning over daily training miles focused on comfort. 

 It comes from a soft plush upper alongside a thick midsole that’s now made from 100 DNA loft cushioning that’s brooks’ popular foam that’s built to offer a balance between responsiveness durability and comfort.  

The shoe features 3d printing on the soft upper to add structure whilst the outsole incorporates a generous level of rubber to help improve durability and traction on the road in different conditions. 

Fit

So, the ghost 14 fits true to size for me. It’s the same size I’ve worn in kind of all brick shoes I’ve ever tested really ranging from Hyperion racing flat all the way to things like glycerin.  

It’s a reasonably roomy toe box around the front, it’s a bit tighter around kind of the side but not in uncomfortable ways it’s a nice stretchy fabric. 

I’ve been using the brooks and ghost 14 over the last few weeks of marathon training, and I took him actually away on holiday as well. 

 I’ve been using kind of lots of quite big fairly big mileage weeks for me and doing kind of a lot of easy and steady running in the kind of the thing that really, they should eat up.  

Overall, I have enjoyed running in them, I think you’ve ended up kind of falling in between a couple of categories from me and not really being all-out comfortable like some shoes are while still being quite as versatile as the better kind of all-rounders on the market. 

The ghost 14 falls in between kind of useful categories, compared to some others it is comfortable but it’s not as comfortable as something like said Nike invincible or brooks glycerin. 

How long do Levitate 5 and Ghost last?

Average lifespan of brooks ghost and levitate 5

Final Thoughts – Should You Buy? 

So, the verdict for me on the brooks levitate 5 is it’s there’s not much really to it that I can talk about really. I just don’t think it’s a strange sort of middling shoe. 

It’s a daily trainer but it doesn’t feel very comfortable to wear for most of your daily miles. 

It’s a temporary trainer, but it doesn’t feel like it’s really designed as well as most of the other sorts of tempo-faster shoes out there at the moment.   

It just makes me feel like I’m just putting in more work in it which I don’t really want I never want an issue. 

So yeah, I think the Brooks Ghost 14 may be slightly softer than this.   

I think it’s designed for a similar thing I think you can use that for faster training miles and it’s a bit more enjoyable. 

Brooks Ghost 14 vs Brooks Levitate 5: Which is good for you?  Read More »

Brooks Ghost 14 vs Brooks Launch 9: Which One is Best for You? 

Brooks has recently become a billion-dollar brand their brand that seemed to perfectly combine innovation with traditionalism into their running shoes.  

Their most popular shoe the ghost is one of my all-time favorites, it’s also one of the most demanded shoes in the whole of the United States out of all footwear categories. 

 So, brooks clearly know how to build running shoes. 

Today we’re going to be taking a look at the all-new brooks ghost 14 and Brooks launch 9.  

Now the brooks ghost has been a go-to daily trainer for runners of all different levels because of its mid-level cushioning its smooth ride and its overall comfortable fit compared to previous versions I like the 14 a lot more. 

Technical Details

Brooks Ghost 14Brooks Launch 9
TerrainRoadRoad, Treadmill
Arch SupportNeutralNeutral
Weight280g230g
PronationUnderpronation
Supination
Neutral Pronation
Underpronation
Supination
Neutral Pronation
Arch TypeHigh ArchHigh Arch
Forefoot Height24mm26mm
Heel to Toe Drop12mm10mm
UsesDaily Run
Long Distance
Workout
Daily Run
Speed Run
Treadmill
Jogging
MaterialMesh UpperReflective Mesh upper
Strike PatternHeel StrikeHeel Strike
Toe BoxWideWide
Check Price For Men

Check Price For Women
Check Price For Men

Check Price For Women

You may also like – Brooks Launch GTS 10 vs Adrenaline GTS 22: Which Running Shoe is Right for You?  

Key Differences Between Brooks Ghost 14 and Launch 9 

Brooks Ghost 14 and Launch 9 are two popular running shoes from the brand.  

Let’s look at the key differences between ghost 14 and launch 9. 

  • Launch 9 is slightly lighter than ghost 14 
  • Heel to Toe Drop Ghost-12mm; Launch 10mm 
  • The Ghost 14 is a little bit more expensive than the Launch 9 
  • Compared to Brooks Launch 9, the Ghost 14 has more cushioning and a wide toe box. 
Brooks Ghost 14 vs Launch 9 comparission


Starting With the Upper of ghost 14 

Its goanna has some small tweaks to it but overall, it’s still that consistent smooth ride that brooks go for with their go-to daily trainers so when we take a look at those small tweaks I want to start with the upper because I think the upper is way more dialed in than it used to be. 

 There’s going to be a simpler 3D footprint mesh that brooks have on top here. 

It’s going to feel more streamlined and when I first tried it on it almost felt like the brook’s launch 9 and the launch GTS – where it’s smoother you slip your foot into it a little bit easier and it’s a very comfortable breathable and overall simple upper which feels great. 

You May Also Like – Brooks Glycerin 20 vs Launch 10: A Comprehensive Comparison 

When you’re taking it for longer runs it really catches that pace nicely and catches that airflow very nicely as well.  

There’s still going to be that padded tongue in that padded collar to give a little bit more of a comfortable feel there are some new laces as well.  

There are more flat laces instead of the puffy plush laces that they had in the 13. So, with those flatter laces the lockdown was really nice it just laid flat across the top of your foot I never got any hot spots when running in the ghost 14. 

It offers not a wide fit but a comfortable fit for any foot type and it fits pretty true to the size it comes in at around 10 ounces.  

So, it’s not going to be the lightest daily trainer but it’s not going to be the heaviest as well. 

It’s still going to be that mid-level daily trainer that you’re looking for so the midsole is going to have a full-length DNA loft as opposed to previous versions like the 13.  

There is only half of that DNA loft cushioning at the initial step in that full-length loft foam felt super soft and I really experienced something different than in the previous versions.


Ride

It’s going to give a smoother ride and a plusher feel but you’re still not going to feel like you’re swimming and cushioning the brooks glycerin is going to offer that max cushioning where if you’re looking for a plusher ride that’s going to be the ball cushioning that you’re looking for the ghost 14. 

pros and cons of brooks ghost 14 and brooks launch 9

Let’s Look at the Brooks Launch 9 

So, let’s run through some of the technical features of the shoe. 

Firstly, the upper of this new model has been totally redone, it’s got a strong synthetic material that really has no cause for concern.  

The shoe is a relatively slim fitting last so while the upper doesn’t restrict your foot it’s not going to offer you extra volume in the toe box.  

The launch uses a thin tongue which initially I was concerned would cause lace pressure issues but it doesn’t and in fact, the tongue disappears on foot the shoe uses flat laces which is a nice touch as this further reduces lace-related pressure risk compared with oval laces. 

Mid Sole & Ride  

The shoe has a flared heel counter which minimizes the pressure on the Achilles and it also has a flared midsole which widens the base of support to give you more ground contact and a more balanced ride.  

These are two really nice features the midsole version nine gains two millimeters of stack height compared with its predecessor and this cushioning is of course bio-Mogo DNA which is a cushioning system that’s neither firm nor soft it’s decently responsive and certainly durable.  

It’s not going to offer you the responsiveness of a racing shoe with p backs foam but it’s going to give you spring to your step with a durable resilient ride 


Outsole

We’ve got a nice outsole coverage with good rubber. It’s got a nice orientation that’s going to give you a good grip and good durability and it also leaves you with the option of taking the shoe for a light off-road run. 

The launch 9 sits on the fence between a speed and distance-orientated shoe that will make it attractive for a variety of runners it will suit someone who’s light and efficient on their feet.  

The most and someone who trains at a variety of paces enough so that you can leverage the shoe’s light and responsive frame come to speed or temper day but also the shoe’s slightly cushioned frame comes an easy day. 

As I mentioned the launch nine is a great bang for your buck option being priced at 110 dollars for such a technical running shoe is a big winning point for some runners and it also is available in a stability equivalent called the launch GTS which is made with guide rails on the side which add an extra bit of support. 

How long do Brooks14 and Launch 9 shoes last? 

image for How long do Brooks14 and Launch 9 shoes last

Related Post – Brooks Launch 10 vs Levitate 6:Which is Best for You

Related Post – Brooks Revel 6 vs Ghost 15: A Comprehensive Comparison 

Related Post – Brooks Revel 6 or Launch 10: Which is Best for You?

Brooks Ghost 14 vs Brooks Launch 9: Which One is Best for You?  Read More »

How to Whiten Yellow Soles on Shoes (7 Clever Ideas) 

Over time it is normal that the soles of our white shoes tend to turn yellow, this is due to exposure to the sun and the natural aging of the material. 

Even if you wash them frequently enough, it is not easy for the sole of the shoes to recover their original color, which is why many wonder how to remove the yellow stain from the sole of the shoes without having to punish the shoes more. 
 
However, this does not mean that you have to discard them, since there are several homemade tricks that can remedy this problem. 

how to whiten yellow soles on shoes

Why do white soles turn yellow? 

Keeping sneakers in perfect magazine condition, as if they were always fresh out of the box, is one of the great challenges that sneakerheads face. 

Usually, the appearance of this color is caused by a chemical reaction in the midsole of the sneaker itself, caused by the flame retardant products used during the production of the rubber that makes up the shoe. 

Another reason is the dirt that accumulates on our shoes over time, as well as exposure to the sun and other stains from specific substances, which means that little by little, the sole of our shoes loses that characteristic white. 

How do You keep my white shoe soles from turning yellow?

There is no better feeling than putting on new sneakers, with that characteristic smell and pristine white. Sadly, that color is short-lived, and no matter how careful you are, it’s almost impossible to keep your shoe soles clean. 

But first, a piece of advice: the best thing to do to keep your shoe soles white and clean is to treat them with stain repellence and waterproofing before wearing them for the first time. 

Also cleaning shoelaces is an important thing for looking at your shoes new, so if you want to learn more about how to clean white shoelaces at home read this article.  

Homemade tricks to clean the white sole of your shoes 

It is true that there are numerous chemical products to whiten shoe soles but, sometimes, there are other more natural alternatives to do it.  

This way you will also avoid the premature deterioration of your shoes by not using corrosive elements. 

But that’s not all, because we show you some homemade tricks to clean the sole and leave it impeccable with ecological alternatives, contributing to the sustainability of the planet. 

Let’s have a look, 

how to clean yellow shoe soles at home

 1. Clean yellow soles with baking soda and hydrogen peroxide 

Hydrogen peroxide, popularly known as a powerful bleach, cleaner, and disinfectant can also be useful when it comes to leaving the soles of your shoes spotless. 

Use a soft toothbrush and soak it in hydrogen peroxide diluted with normal water. Rub the soles until all the yellow is removed and, finally, let them dry in the open air. 

You can also use a mixture of baking soda and hydrogen peroxide for better results.  

For doing that,  

  • Mix 1 tablespoon of baking soda and half a tablespoon of hydrogen peroxide with water. 
  • Use a toothbrush dipped in this mixture to scrub the shoes, and wait 30 minutes for the baking soda to work its magic. 
  •  Then rinse with water. 

2. Clean Yellow soles with Coarse Salt & Washing Detergent 

We know that coarse salt has multiple uses for cleaning the home. One of them consists of whitening shoe soles since its properties help to dislodge accumulated dirt. 

They can also help enhance the white color when it begins to fade. 

To do this,  

  • Use a dry clean brush to remove dirt from the shoes. Do it both on the outsole and midsoles, so rub a handful of coarse salt on the soles of your shoes. 
  • Let it act for about an hour  
  • After this time, rinse the footwear with plenty of cold water and your usual detergent for handwashing.  
  • Next, remove the laces and insoles and soak them in a bowl of soapy water. Finally, let everything dry in the sun. 

3. Clean with toothpaste 

Did you know that toothpaste can become your best ally to clean the soles of your shoes?  

Its content of bicarbonate and calcium carbonate, among other substances, makes this product as good for whitening teeth as it is for removing yellow from other products, such as our footwear. 

This remedy is ideal for keeping shoes clean, as well as the white rubber on the sole. And to use this method you only need white toothpaste, an unused toothbrush, and a damp cloth. 

When you have everything ready, do the following steps 

  • Use a damp cloth to remove the most obvious dirt from the soles, including the white edges. 
  • Moisten the brush slightly with a little water, generously add the toothpaste, and rub, paying special attention to the areas you want to whiten.  
  • Little by little a foam will be created that will impregnate all the dirt, so let it act for a few seconds and then remove it with a damp cloth. 

4. Clean Soles with Leamon and Powdered Detergent 

The powdered detergent that you use for laundry is also the basis of an ideal homemade trick to clean the shoe soles.  

If we add the antibacterial, disinfectant, and whitening properties of lemon to this product, we will obtain a perfect natural remedy to leave our shoes on the first day. 

  • Mix a splash of natural lemon juice with a tablespoon of soap powder. 
  • It should be a solid paste, so if you mix and you see that there is too much liquid left, you can add a little more powdered soap (but without going overboard!) 
  • Spread the paste with a brush or a cloth all over the sole, along the edges and tips. 
  • Let the mixture act for about 5-10 minutes and, after this time, rinse with plenty of warm water. 

5. Clean yellow soles with Nail Polish Remover 

Many times, the problem is not so much the dirt embedded in the sole, but what you wonder is how to remove the yellow from the sole of the tennis shoes without damaging them.  

One of the most effective remedies is to resort to acetone or nail polish remover that you generally use for your nails, since it is a chemical compound with solvent properties that, as well as facilitating the removal of nail polish, can also help to eliminate persistent stains. 

We explain how to remove the yellow from the plastic of tennis shoes: 

  • Before you start, wipe the entire sole with a damp cloth to remove any dirt particles. 
  • Apply nail polish remover to the yellowed edge with a soft brush. 
  • To finish, give one last pass, this time, with a cloth on which you have put a few drops of acetone. 
  • Let your sneakers dry out of the sun. 

If you want to increase the effectiveness of this remedy, try mixing the nail polish remover with a small tablespoon of baking soda. 

6. Using Magic Eraser for Whitening of Yellowing Shoe Soles 

Black or yellow marks in the form of scratches on the white soles of your sneakers?  

Another simple way to get your sneakers white again, especially if they have rubber soles, is to use a small cleaning tool called a Magic Eraser, which can be found in any supermarket. It’s a cube of white foam that can remove almost any mark, just add water and start rubbing. 

Use the rubber to minimize the black streaks as much as possible, and then put into practice some of the home remedies that we have previously offered you. 

7. Whitening Shoe Soles with Baking Soda and Vinegar 

Another of the most effective homemade tricks to clean the sole is vinegar with baking soda, as both are great whiteners and clean surfaces in depth.  

Therefore, this mixture is ideal for whitening beach soles 

In addition, this combination is antibacterial and will help fight fungi and bacteria, which cause the bad smell that is generated in the feet.  

To do this, you need a cleaning brush, six tablespoons of baking soda, and a cup of white vinegar. 

To keep shoes clean and eliminate the yellowish tone that they may have acquired over time, mix the baking soda with the vinegar in a container and wait a few minutes until the foam that has formed subsides.  

Then, wet the brush with this mixture and vigorously rub on the shoe soles. Let it act for about 30 minutes before rinsing with plenty of water.

Final Thoughts 

To keep your shoes clean or remove the yellowish tone and make them white again, you can use any of the homemade tricks to clean the sole that we have shown you. 

They are very effective and, in addition, they will leave your shoes like new without damaging them.  

If you, do it regularly without waiting for dirt to accumulate, you can keep your shoes in good condition much longer. 

Forget about chemical and aggressive products, such as bleach or whiteners, the only thing they can do is damage the footwear. 

I hope you found this article interesting and useful.    

With that, it’s time to hear what you have to say.    

Now you may have a clear idea about how to whiten yellow shoe soles at home easily.    

Or maybe you have a question.      

Either way, let me know your thoughts in the comments section below. 

How to Whiten Yellow Soles on Shoes (7 Clever Ideas)  Read More »

Shoelace Aglet/Tip Repair and Replacement (3 Clean and Practical Ways)

Many times, you will have tied your shoes or sneakers and you will have seen that at the end of the laces there is a plastic or metal tip.  

Well, you should know that this is called an aglet. Although it seems that they are not very useful, the truth is that they fulfill a very important function, or rather a several. 

Nobody can deny that the laces of our shoes are one of the most essential things in our daily life, although most of the time we don’t even notice it.  

Of course, there is nothing worse than getting up one morning, putting on your favorite shoes, and realizing that the ends of your shoelaces are damaged, tarnishing your outfit and preventing you from putting it on properly.  

If this has ever happened to you and you’re thinking of throwing away those old shoelaces, don’t do it! They still have a remedy and that is why, in this article, we propose 3 easy ways to fix them. 

Why do shoelaces have aglets? 

The most important is to keep the fabric strands of the laces together, preventing them from fraying and spoiling.  

Another function is to make it easier to pass the laces between the holes in the shoe. Imagine how difficult it would be to get them around without them. 

The aglets facilitate the fastening of each lace, making it possible to hold them with just two fingers, to make it easier to tie them.  

And finally, it is undeniable that it also makes the shoe look prettier. They wouldn’t be pretty or as easy to handle if we just had frayed laces. 

Are shoelace Aglets important? 

Its most important function is to hold the fabric strands of the laces together. The tips of the shoelaces are protected by the aglets and are prevented from fraying. 

Another relevant utility is to make it easier for the laces to pass through the holes in the shoe.  

Aglets, much like needles with threads, make it easy for the wearer to weave shoelaces in and out of the series of holes in the shoe known as eyelets or lugs and also allow the wearer to tighten the laces. In addition to shoelaces, aglets are used to cover the ends of shoelaces. 

Different types of metals such as copper, bronze, silver, and gold have been used throughout the centuries to make useful and decorative aglets. 

Can aglets be repaired? 

Shoelaces have to put up with a lot of wear and tear. Every time we step into our shoes, our shoelaces have to tie the shoe to our feet.  

Eventually, shoelaces will wear out from use, most of the time they will begin their decomposition at the aglet. 

But don’t worry, there are some easy ways to repair your tags. You will extend the life of your laces. Extending the life of shoelaces is green because it keeps old laces out of the landfill and reduces the material needed for new laces. 

How to repair shoelace aglet 

1. Fixing Shoelace Tips with Metal Aglets Professionally

This is an easy and professional way to fix a shoelace aglet without replacing it. This method is really fast too. 

For doing that all you need, 

  • Scissors 
  • Metal Aglets 
  • Crimping Tool 

Look at the video for how to fix shoelace tips with metal aglets professionally.

2. Fixing Shoe Aglet Using Shrink Tube 

Another way to fix your frayed shoelaces is using a heat shrink tube. It is also an easy and professional way to fix your shoelace tips. 

For doing that all you need, 

  • Scissors 
  • Shrink Tube 
  • Lighter 

Step 1.  Cut the Shrink Tube 

fixing shoelace with shrink tube

First off cut off the frayed shoelace and take the shrink tube and cut with scissors to the length you want for the aglet. 

Step 2. Put the Shrink Tube into the Laces 

repair shoelace aglet with shrink tube

After cutting the shrink tube, place it over the shoelace end. 

Step 3.  Shrink the Tube Using a Lighter 

how to repair shoelace aglet with lighter and shrink tube

After placing the tube to the shoelace end shrink them with a lighter slowly. Be careful don’t heat them too much.  Then squeeze them a little bit for the perfect shape. 

Step 4. Done! 

fixing aglet professionally

3. Repair Shoelace Aglet Using Scotch Tape 

If you do find your dog or cat chewing on your shoelaces and damaging them. Of course, it is frustrating especially if you are hurry for going somewhere.  

Don’t worry, this is an easy and fast way to fix your shoelaces. Yes, it seems to be unprofessional but this is an easy and quick method. 

So, you can buy the new shoelace they’re not so expensive but it’s this is not happening for the first time, right?  

Yes, it always happens. For me, it happens many times. So, I realized it might be better I will fix it myself and it will last longer.   

I don’t need to go every half a year to the shop to buy an old shoelace. 

For doing that All you need, 

  •  Scissors 
  • Sticky Transpirant Tape

Step 1.  Take a Sticky Tape and Cut with Scissors 

how to repair shoelace tip with sticky tape

Take a sticky tape and cut with scissors two small pieces for taping the tip of your laces. 

Step 2.  Wrap It Tightly with the Sticky Tape 

repair aglet using sticky tape

Wrap one end of the tape around your lace tip then squeeze a little bit for the perfect shape

Step 3. Done! 

fixing shoelace DIY

Almost done! The laces can pass through the holes in the shoe easily 

Alternative Methods 

  • Fix them with polish — If the tip of your shoelace has become deformed, all you have to do is place it in a bottle of clear nail polish (or whatever color you prefer), and leave it like that overnight. In the morning, you will notice that it has hardened and you can now use it normally. 
  • Burn them a bit — This solution is ideal for frayed laces since there is nothing like a fire to forget about this problem. Very carefully, take a lighter or a match and bring the tip of the lace close, so you can seal it with heat. When it cools you will notice that it is the same as before. 
  • Use duct tape — Find a transparent zeal and wrap a small piece around the end of the cord you want to fix. It is best to give it several turns, to make sure it is resistant. This is one of the simplest solutions and one that can get you out of any trouble. 

Final Thoughts 

I hope you found this article interesting and useful.  

With that, it’s time to hear what you have to say.   

Now you may have a clear idea about how to fix your shoelace aglet.  

Or maybe you have a question.  

Either way, let me know your thoughts in the comments section below. 

Shoelace Aglet/Tip Repair and Replacement (3 Clean and Practical Ways) Read More »

Brooks Adrenaline GTS 22 VS Brooks Glycerin GTS 20: Which is Better

In this article, we’re going to compare the all-new Brooks Adrenaline GTS 22 and the Brooks Glycerin GTS 20.  

Without further ado, Let’s Get Started. 

Technical Details

Brooks Glycerin GTS 20Brooks Adrenaline GTS 22
TerrainRoadRoad
Arch SupportNeutralStability
Weight286g281g
PronationUnderpronation
Supination
Neutral Pronation
Underpronation
Supination
Neutral Pronation
Arch TypeHigh ArchHigh Arch
Forefoot Height20mm24mm
Heel to Toe Drop10mm12mm
UsesDaily Run
Long Distance
Workout
Daily Run
Long Distance
Workout
MaterialMesh UpperMesh Upper
Strike PatternHeel StrikeHeel Strike
Toe BoxMediumMedium
Women’s – Check the Price
Men’s – Check the Price
Women’s – Check the price
Men’s – Check the Price

Also Read – Brooks Glycerin 20 vs Launch 10: A Comprehensive Comparison 

Key Differences Between Brooks Adrenaline GTS 22 VS Glycerin GTS 20 

The major difference is the Glycerin GTS 20 has a DNA loft v3 midsole while the Adrenaline GTS 22 has a 100 percent DNA loft Midsole as opposed to the combination of DNA loft and bio-Mogo DNA in the Glycerin 20.    

Other key differences are,    

  • The Heel-to-Toe Drop of the Glycerin 20 is 10mm and the Adrenaline GTS 22 has a 12 mm drop.   
  • Both have a wider toe box.   
  • The Brooks Adrenaline GTS 22 is slightly more lightweight than the Glycerin GTS 20. 
Brooks Adrenaline GTS 22 vs glycerine GTS 20 comparison

The brook’s adrenaline is back and better than ever with a redesigned midsole and an upgraded upper.  

The latest version of the brook’s adrenaline features a 100 percent DNA loft midsole, which creates a softer and smoother ride than previous versions.  

And brook’s reliable guide rail support system keeps you moving efficiently for miles on end fleet feet.   

Also Read – Brooks Launch GTS 10 vs Adrenaline GTS 22: Which Running Shoe is Right for You?  

Features

First, let’s go over some tech specs – so, the brooks adrenaline GTS 22 weighs in at 9.1 ounces (about 257.98 g) for women and 10.2 ounces (about 289.17 g) for men’s this shoe has a 12-millimeter drop and it’s classified as a stability shoe this shoe is perfect for daily training and it’s best to be used on the road or the track.  

The brook’s adrenaline has a reputation for being a comfortable reliable support shoe the latest version of the adrenaline takes things a step further with a completely redesigned midsole, the midsole is made with 100 percent DNA loft cushioning which is brook’s softest midsole cushioning ever.  

Previous versions of the brook’s adrenaline featured a mix of DNA loft and bio-Mogo DNA midsole. DNA loft is made up of EVA foam rubber and air ensuring a soft lightweight but durable ride although the midsole feels slightly softer than previous versions of the adrenaline. 

 It still offers the same reliable supportive fit.  

Brook’s signature guide rail technology which is two firm pieces of foam along the outer sides of your heel prevents excessive inward or outward rolling to help reduce the effects of overpronation.  

Brook’s segmented crash pad, a system of shock absorbers placed underneath the forefoot, offers maximum protection while helping you rebound off the ground.  


Upper

The brooks adrenaline GTS 22 features a lightweight breathable mesh upper that holds you in and provides a little bit of extra support.  

The upper is created with brooks’ 3d fit print technology which uses screen printing to apply an engineered structure to the shoe’s upper, this process maintains the shoe’s integrity while allowing for a flexible lightweight feel.  

Reflective strips on both sides of the toe box add increased visibility for early morning or late-night runs and a structured heel cup holds you in. 

Midsole 

The biggest difference runners will notice in the brook’s adrenaline GTS 22 compared to the 21 is the lighter softer midsole and this again is from the 100 percent DNA loft midsole as opposed to the combination of DNA loft and bio-Mogo DNA in the previous version.  

The latest version of the brook’s adrenaline also uses a more refined print process for the upper allowing for a little bit more of a flexible feel while the latest version of the brook’s adrenaline remains true to its roots as a comfortable stability shoe – a redesigned midsole and a refined upper make it a little bit more of a comfortable experience. 

Brooks adrenaline gts 22 vs glycerine 20  pros and cons

Let’s Talk about Glycerin GTS 20 

Upper 

We have got a new upper design and an engineered mesh; it’s got some minor changes over the last version.  

We’ve got some printed overlays that are just going to be a little bit tweaked to help fine-tune that fit but you’re still going to have that luxurious comfort.  

Plenty of foam in the heel on the tongue. 

 When you slip this shoe on your foot, you’re just going to feel a lot of comforts and it’s going to feel like that glycerin experience you’ve come to expect year after year.  

Overall, the brooks glycerin GTS 20 is probably going to be the most exciting update to this series.  

In a while DNA loft v3 really adds a much better on-foot experience it feels livelier it feels softer it just feels like this shoe. 

New Features 

The new brooks glycerin GTS 20 is back, it’s been completely revamped from top to bottom with a lot of unique features that are going to be seen in this new version, which is really going to elevate the series. 

 But of course, it is going to still live side by side that standard glycerin 20, but that GTS designation is going to give that added stability that is really going to enhance uh pronation features for moderate to maximum overpronators.  

First, the thing we got to look at with this shoe is, of course, going to be that new midsole compound we’ve got DNA loft v3 we saw in the glycerin 20.  

Now we’re going to see it in the GTS version as well that loft v3 is going to be nitrogen-infused, it’s very soft, it’s very responsive, and it’s very light.  

It has a similar feel to the DNA flash, but I do feel like it is just a little bit more fine-tuned for your daily training, maybe a little bit softer.  

I think it really works well as you’re just putting in the miles.  

Now with the GTS version as opposed to the standard version you’re going to get those a little bit higher sidewalls those guide rail systems that are really going to help guide your foot naturally. 

 As a neutral runner I’ve still been able to use this shoe, but it is going to be geared towards more moderate to maximum overpronators people who can need just that little bit of added stability in their daily training lineup.

Also Read – Brooks vs Asics: The 7 Key Differences Between Brands

Outsole 

Moving on down to the outsole, very standard with the glycerin we’re going to have plenty of rubber from the forefoot to heal and have all the durability and traction you need to put in the miles. 

 There are going to be some small changes in flex grooves but overall, a very similar design to the past version. 

Average Lifespan

The average lifespan for brooks adrenaline gts22 and glycerine 20

Final Thoughts- Should you BUY? 

Compared to the glycerin GTS 20, I like the Adrenaline GTS 22 more.   

Overall, the brooks adrenaline GTS 22 is a great everyday training shoe for runners and walkers seeking stability and support.  

They provide generous impact absorption without feeling too heavy or clunky.  

What are your thoughts on Glycerin GTS 20 and Adrenaline GTS 22? 

Brooks Adrenaline GTS 22 VS Brooks Glycerin GTS 20: Which is Better Read More »

Is It Ok to Put Shoes In The Dryer? (Explained)

Keeping your shoes clean is essential for maintaining their appearance. 

However, drying them after washing can be a time-consuming process.

The question is “Is it ok to put shoes in the dryer?”  

If you’re in a rush and need to wear them on the same day, you may consider putting them in the dryer.  

While this method can expedite the drying process, it’s important to note that it can cause damage over time.  

is it ok to put shoes in the dryer

To ensure the safety of your shoes, here are some guidelines to follow when using the dryer: 

Choose the low-temperature setting 

To avoid damaging your shoes, always set the dryer to a low heat setting.  

High temperatures can loosen the glue and overheat the rubber, leading to potential damage.  

Remember to select the appropriate temperature before starting the dryer. 

Add old clean towels 

Place a few old clean towels in the dryer along with your shoes.  

This not only helps speed up the drying process but also reduces the noise generated during drying.  

It’s important not to rely on this method too frequently, as it can cause damage to your shoes

However, it’s worth noting that putting shoes in the dryer is generally not recommended.  

Heat produced by the dryer can cause rubber soles to warp or shrink.  

Certain shoe brands may allow drying with a dryer, so it’s best to check the labels for instructions specific to your shoes.  

Some brands may provide instructions to remove insoles or use special covers for drying, but this may not be applicable to all shoes. 

When considering whether to put your shoes in the dryer, there are a few factors to consider: 

You May Also Like – The lifespan of a Running Shoe: Things you should know

Check the care label 

check the care label

Look for the care label on the inside of the shoes or the tongue to determine if your shoes are suitable for drying in the dryer.  

Materials such as leather, suede, or gel-filled inserts can be damaged by the heat, so it’s important to check the label and identify the materials used. 

Consider the material 

Different materials, such as leather, suede, foam, rubber, plastic, textiles, and synthetics, require different care.  

If your shoes contain leather, suede, or fur parts, it’s best to avoid using the dryer altogether, as the heat can cause damage.  

When in doubt, assume that your shoes are not suitable for the dryer to prevent accidental damage. 

To dry your shoes properly without using a dryer, here are some alternative methods 

Dry shoes with newspaper 

If you want to dry your shoes without risking any damage, using newspaper can be an effective method.  

stuffing my shoes with news paper for quick drying

Remove the insoles (if present) and stuff the shoes with rolled newspaper to absorb moisture.  

Wrap each shoe with 2-3 sheets of newspaper to complete the drying process.  

Check the condition of the newspaper every few hours and replace it if it becomes damp. 

Dry shoes with a fan  

Using a fan can help accelerate the drying process.  

Hang your shoes from a rack using wire hooks, ensuring the inside of the shoes faces the fan and the soles face outward.  

Take care to avoid the cords coming into contact with the fan blades.  

Monitor the drying progress and periodically check the shoes. 

Dry shoes using the fridge 

Stuff the shoes tightly with newspaper to transfer moisture and prevent mold.  

If your refrigerator has a heated rack, hang the shoes behind it so that the soles are near the heat pipes.  

Allow them to dry for half a day and then transfer them to an open-air environment to complete the drying process. 

Also Read – Washing Geox Shoes: My Personal Experience and Cleaning Tips

Dry shoes with sunlight 

Placing your shoes in direct sunlight is a natural and effective way to dry them.  

Remove the laces and open the tongue to ensure sunlight reaches the entire surface, including the tip of the shoes. 

Remember, wearing wet shoes for extended periods can lead to foot problems such as Trench foot or immersion foot syndrome, bacterial or fungal infections, and blisters.  

It’s crucial to change into dry shoes and socks if your footwear gets wet, especially in cold weather conditions. 

In conclusion, while it’s not necessary to wash and dry your shoes frequently, occasional cleaning is beneficial.  

If time permits, it’s recommended to air dry your shoes with something like paper stuffed inside to help maintain their structure.  

If you’re in a hurry, you can try one of the alternative drying methods mentioned above. 

Always refer to the manufacturer’s instructions for specific guidance regarding drying your shoes. 

We hope you found this article informative and helpful.  

If you have any questions or feedback, please feel free to share them in the comments section below. 

FAQ

Are there any risks or potential damage to shoes when using the dryer?

While drying shoes in the dryer is faster than air drying, it can potentially cause damage over time. High temperatures can loosen glue and overheat rubber, leading to warping or shrinking of rubber soles. It’s important to use caution to minimize the risks. 

Can all types of shoes be safely dried in the dryer?

Not all shoes are suitable for drying in the dryer. It’s best to check the care label of your shoes. Shoes with leather, suede, or fur parts should generally be avoided in the dryer. Some shoe brands may allow drying with a dryer, so checking the labels is essential. 

How should I prepare my shoes before putting them in the dryer?

Before placing shoes in the dryer, it’s recommended to loosen the laces and tie the shoes together. This prevents them from banging against the dryer walls. For shoes with laces, place them toe-down, holding the laces against the top of the door. Avoid drying shoes without laces to prevent potential damage. 

What are the alternative methods for drying shoes without using a dryer?

If you want to avoid using a dryer, there are alternative methods. You can stuff the shoes with newspaper to absorb moisture or place them near a fan to facilitate air circulation. Additionally, drying shoes in sunlight can be effective, especially for sneakers. 

What should I consider before deciding to use the dryer for my shoes?

Before using the dryer, consider the material of your shoes. Leather, suede, and gel-filled inserts can be damaged by the heat. Always check the care label inside the shoe or on the tongue. When in doubt, assume they are not suitable for the dryer to prevent accidental damage. 

How long does it typically take to dry shoes in the dryer?

The drying time depends on several factors, including the shoe material, size, and moisture level. Setting the dryer to low heat and running a full cycle is recommended. If the shoes are still damp, you can extend the drying time by an additional 20-30 minutes. 

Can I use a high-temperature setting on the dryer for faster drying?

Using a high-temperature setting on the dryer is not recommended for shoes. It can lead to damage by loosening glue, overheating rubber, or warping the shoe structure. To avoid potential harm, always set the dryer to a low-temperature setting. 

What precautions should I take to avoid damaging the shoes in the dryer?

To prevent damage, add a few old clean towels to the dryer with your shoes. This reduces noise and speeds up drying time. Avoid drying shoes in the dryer too often, as it can cause damage. Always check the care label and use the low-temperature setting to protect your shoes. 

Are there any additional tips or recommendations for drying shoes effectively?

Yes! If you prefer alternative drying methods, you can use newspaper to absorb moisture effectively. Also, avoid wearing wet shoes for an extended period to prevent foot problems and potential infections. Properly maintaining the cleanliness of your shoes is also important. 


Is It Ok to Put Shoes In The Dryer? (Explained) Read More »

What Is the Average Shoe Size for a Woman – Explained

In the United States, the average shoe size for a woman is between 8.5 and 9 equivalent to a UK 6.5 size. Although of course, it all depends on the person’s height.

average shoe size for a women

Although there is no official worldwide shoe size for women, size is determined by metrics. The most common metrics used in shoe size are the US, UK, Japan, and EU metrics. 

So, what is the average shoe size for women?  

Well, these sizes are usually divided into groups: some groups of shoe sizes are more common and sell out faster than others.  

Ultimately, this shows the average shoe size for women. 

The American Academy of Orthopedic Surgeons reported that the average shoe size for women worldwide is between 7 and 8, while the average American female shoe size is 8.5.  For men, it is up to 10.5

However, the difference between various sizes is not much and is really only about an inch difference. 

Average female shoe size by height 

Age  Height Average Shoe size (US)Average Shoe size (UK) Average Shoe size (EU) 
20 Above 4.9 to 5.3 5 to 8.5 2.5 to 5.5 35 to 39 
20 Above 5.4 to 5.7 6.5 to 10 4 to 7.5 37 to 42
20 Above 5.8 to 6 and more 9 to 15 6.5 to 1340 to 48.5 

Wearing the right shoe is an important thing for maintaining our foot health

As we get older, our feet tend to get longer and our shoe sizes increase because the tendons and ligaments stretch and lose elasticity. 

 Certain weight fluctuations and some medical conditions can also cause changes in shoe size. So, a lot of people will wear bigger shoes later in life. 

Is there a relationship between height and foot length? 

Foot size and height have a direct relationship with each other, although the exact calculation of this relationship cannot be precisely determined. 

This relationship has been questioned and studied over the years by scientific researchers and medical professionals and the results of such studies may explain how it can be used to predict it. 

From a physiological point of view, it stands to reason that taller people need larger feet to support a longer body and improve balance.  

Foot size and height depend on many factors such as gender, genetics, health, and environment. 

Some of these factors are subject to change due to genetic abnormalities, disability, poor diet, and hormonal imbalances. These variables can affect the relationship of height to foot size.

Does size matter? Explained

It is a fact that the number of women who wear a larger shoe size has increased significantly in recent times. 

However, the shoe market offer has not been able to perceive this new need well and many of them have to go around a lot to get their feet dressed in the right size, without having to give up their own style. 

Does shoe size change with weight loss?

Weight loss can cause general changes throughout your body.  

The extent of these changes largely depends on how much you weigh, how much you lose, and how quickly these changes happen. 

It takes time for the body to fully adapt to the change in body mass, particularly the skin and other parts of the body that may also be affected, as it is unlikely to lose fully proportionate weight. 

In some cases, you will notice that your foot gets smaller and may change size. 

If you are obese and have developed significant fat deposits in and around your foot, a weight loss program should help you gradually lose weight. 

 As you lose weight, you will notice that this happens in proportion to the rest of your body and it can happen for a long period of time.  

However, if the fat that has developed in the foot is resistant to removal through natural diet methods. 

Surgical procedures like liposuction suck out excess fat, slimming your foot and potentially changing your shoe size. 


Does shoe size change with pregnancy? 

Surely on more than one occasion, you have heard a woman who has had a baby say that since pregnancy her shoes are tighter, and perhaps she says the opposite, that she has more shoes to spare.  

The reason is that during pregnancy, the foot can grow, but it can also shrink. 

It sounds strange, it sounds unlikely, but it happens nonetheless.  

What’s more, it happens to 6 out of 10 women, to a greater or lesser extent (many hardly realize it). 

A study published in the American Journal of Physical Medicine & Rehabilitation not only confirms that the feet can increase in size during pregnancy, but also that they can shrink, and also gives us more data. 

The researchers found that in many women the height of their plantar arches changed during pregnancy, increasing or decreasing the size of the foot.  

The change in the foot seemed to be greater if the pregnancy was the first.  

The variations ranged from a 4mm reduction in the length of the foot to a 10mm increase (1cm). 

The most common is that: the foot grows between 2 and 4mm, which could mean an increase of half to one size in shoes. 

How Can I Measure My Foot Size at Home 

To calculate your size, you need two sheets of paper, a ruler, and a thin pencil. Follow these steps: 

  • Lay a sheet on the floor. 
  • Support your back against a flat surface. 
  • Support one foot and your body weight on the blade. 
  • Ask someone to draw the outline of your feet with a pencil. 
  • Mark the longest part of your foot with a line and measure it in centimeters. 
  • Add 7mm to the longest part because as you walk your foot expands and this will be your shoe size. 
  • Check the measurements with the size chart and choose the shoe size. Also, check this article if you want to learn more about measuring shoe widths

How to choose the right shoe size for you.

A social idea was built that indicates that our footwear speaks of us; Wearing sneakers is not the same as wearing high shoes, because we choose one or the other depending on what we want to communicate.  

Do we want to show that we choose comfort or that we are seductive and attractive? That apparently depends on what we choose to wear in the morning. 

However, what happens when our choice is conditioned by what we can use? 

Today, they are constructed as an object of desire that represents femininity and even power.  

It doesn’t matter if our feet hurt, because according to the logic of advertising, nothing is going to make us feel more desired and empowered than a good pair of high heels.  

The footwear for a woman would come to be what the car represents for the man in the supposed construction of his masculinity. 

Although we can question whether shoes play a fundamental role in building our self-esteem or not, there is an undeniable reality: they are a functional factor in the exclusionary system that continues to reproduce unattainable stereotypes and leaves out an important portion of society that it does not adapt to the norms of what is considered beautiful.

Final Thoughts 

I hope you enjoyed this article about average shoe size for women  

Now I’d like to hear from you: What is your shoe size? 

Let me know by leaving a quick comment below right now. 

What Is the Average Shoe Size for a Woman – Explained Read More »

How to Clean White Shoelaces (5 Clever Hacks)

White sneakers are very popular footwear, as they combine very well with a wide variety of looks. However, they can also become a big problem when it comes to cleaning them. 

 If you had a walk in the country or simply from the effects of pollution, you will see that the white laces have turned gray or brown. 

In this way, the whiteness of your shoe goes into the background, contrasted with that unpleasant color.  

Although there are many people who prefer to give them up for the loss and replace them with new laces, there are some simple and quick hacks to make them shine. 

How to clean white shoelaces

Can you wash shoelaces in washing machine? 

Before putting the shoelaces in the washing machine without giving it much thought, it is important that we ask ourselves if washing laces in the washing machine is the most advisable thing to do. 

The truth is that it can damage over time, so it is not the safest method to clean them.  

In fact, manufacturers like Nike, Asics, and Adidas suggest avoiding it. 

Many sneakers have different types of laces in terms of textures and colors, some are made of materials such as leather or suede.  

Therefore, a large amount of water they receive in the washing machine can be harmful to this type of material and it is best to wash them by hand. 

However, if they have a very difficult stain to remove, you can resort to this method from time to time. Here we will show you the best way to wash the shoelaces in the washing machine. 

White shoelaces have a reputation for getting dirty the same day we wear them. Over time, they accumulate so much dirt that they can appear to be a different color.  

Is there any way to return them to their original whiteness?  

There is a little trick that you can use, and for which you only need baking soda and talcum powder. 

Follow these steps and discover how to wash white shoelaces in the washing machine so they look like new. 

  • In a bowl, mix one and a half parts detergent with one part baking soda. Stir until both substances are well mixed. 
  • Moisten the shoes with a spray bottle or a damp cloth. They should not be very wet. 
  • Using a small brush, take the detergent and baking soda mixture and scrub your laces with it. Let the mixture take effect for a few minutes. 
  • Rinse the laces and sprinkle talcum powder on them to absorb moisture. 
  • Put them in the washing machine as we have indicated in the previous steps, but do not use soap. Use only the cycle water. You will see that they are like new! 

We recommend that you do not put the shoelaces directly in the washing machine drum, as it is better to wash them inside a cloth or mesh bag.  

Some branded sneakers come with their own bag, but if you don’t have a special bag, you can use any delicate bag. 

Can you bleach shoelaces to make them white? 

When the washer cycle is done, remove the laces from the mesh bag. If they’re not as clean or white as you’d like, you can add a bleach bath.  

If you are using chlorine bleach, you may want to wear rubber gloves when adding and removing the laces from the solution.  

For cotton laces,  

  • Pour two cups of warm water into a plastic or glass container and add one teaspoon of chlorine bleach, stirring well to mix.  
  • Add the laces, shake them through the solution so they are completely wet, and allow them to soak for five minutes.  
  • When the time is up, rinse the laces with cold water. If you are bleaching multiple pairs of laces, double the amount of water and bleach. 

For synthetic laces,  

  • Pour two cups of warm water into a plastic or glass container and add one tablespoon of oxygen bleach, stirring well to mix.  
  • Add the laces, shake them through the solution to thoroughly wet them, and let them soak for at least two hours, up to eight hours is fine.  
  • Oxygen bleach works much more slowly than chlorine bleach. Rinse well before drying. 

How to Clean White Shoelaces by Hand Washing 

how to wash white shoelaces by handwashing

1. Cleaning yellow strain with ammonia and baking soda 

Ammonia is of great help in solving the problem of how to whiten shoelaces that have been stained or yellowed.  

Well-used ammonia has a great advantage: it does not harm this type of fabric. Therefore, it is very effective for cleaning white shoes also 

If you want to wash white laces with ammonia follow these steps. 

  • With a toothbrush, remove the dust and dirt accumulated on the surface of the laces. 
  • In a plastic cup, mix the ammonia and dishwashing soap with the 2 liters of water. 
  • Place the laces in the cup and let them soak for 1 hour.  
  • Apply the baking soda and scrub with the toothbrush. Then Rinse the laces with cold water. 
  • After removing the baking soda, let the laces dry outdoors and in direct sunlight. 

2. Cleaning shoelaces with chlorine and vinegar 

Another effective method of handwashing white shoelaces is by using bleach, vinegar, or toothpaste.  

Although it seems a somewhat strange mixture, it is very effective. Take note of these instructions: 

Take out the laces of your sneakers and leave them in a container with soap and chlorine, for about 10 minutes. 

If you prefer to use vinegar, mix the vinegar with some blue liquid laundry detergent, take both products in a container and place the laces in the container and let them soak for 10 minutes. 

Probably you may be a question in your mind why use a blue detergent? basically what the blue does is it brings out the widest white in the laces that’s why when you do your laundry a lot of the detergents are blue.   

Let it act for about 10 minutes and rinse the laces with cold water.  

Then sock them with a clean, dry cloth. If there are remains, you can wash the laces with plenty of water and let them dry in the sun. 

3.Clean white shoelaces with baking soda 

How to whiten your stained or yellowish laces easily without using bleach?  

For this, baking soda is an excellent ally. Combining this product with hydrogen peroxide, you will see that cleaning white laces is much easier than it may seem at first.  

Since these two ingredients will allow you to remove stains that seem impossible to remove (bloodstain, coffee stain, etc.) and show off your radiant laces again. 

In a plastic container, mix 10 grams of baking soda, 10 ml hydrogen peroxide, and some water. 

  • Apply the paste mixture on the parts that have been more stained and cover them completely.  
  • Use the toothbrush to work the mixture into the laces and rub gently, emphasizing any stained areas. Leave them with the paste for 2 hours so that it has the maximum possible effect. 
  • Dry the shoelaces in a sunny place. 
  • When the paste is applied to the laces completely dry, remove the remains of baking soda from the laces with the thick bristle brush, which must be completely clean and dry. 
  • Then you can wash the laces with plain water to remove them and let them dry again. You will see how, after this treatment, your shoelaces will look like new. 

How do you dry your shoelaces fast?

Drying shoelaces fast

Not only washing your dirty laces but drying them is also an important thing to do. Your shoelaces may be damaged if you occasionally put them in the dryer.  

If you want to dry quickly, first you need to squeeze with a clean and dry towel and then you can put them in front of a fan or air-drying them is the best way of drying. 

Conclusion 

I hope you enjoyed this updated guide to clean white shoelaces at home 

Now I’d like to hear from you: Which method are you using to clean your dirty laces?  

Let me know by leaving a quick comment below right now. 

How to Clean White Shoelaces (5 Clever Hacks) Read More »

Scroll to Top